Introducing Our 3D Relief Conch Star Wax Seal Stamp
Close your eyes for a moment and let your mind wander to the beach, where the gentle waves lap at your feet and treasured shells glisten in the sun. Shells and conches have forever held a special place in our hearts, evoking nostalgia and the wonder of ocean life. If you're a sea lover or simply captivated by the intricate beauty of shells, our 3D Relief Conch Star Wax Seal Stamp is more than a stamp; it's a work of art designed to bring the essence of the ocean to your creative endeavors.
What sets this wax seal stamp apart? It's the meticulous attention to detail, the infusion of romantic themes, and the craftsmanship of high-quality brass. But beyond that, it boasts a unique 3D relief technique that breathes life into the design. Elaborate engraving technologies make the design exquisitely detailed and beautifully tactile. This isn't just a wax seal stamp; it's a voyage into the heart of ocean magic. Join us on a journey into the depths of creativity with the 3D Relief Conch Star Wax Seal Stamp. Let the romance of the sea inspire your imagination and turn every piece of art you create into a tribute to the eternal allure of the ocean.
Crafting Enchanting Wax Seals with 3D Relief Conch Star Stamp
The real magic of the 3D Relief Conch Star Wax Seal Stamp is in your hands. It's like being the captain of a ship on a boundless sea of creative opportunities. Here, every wax seal is a canvas, every wax stick a brush, and every press an artistic stroke.
- Gradient Color Wax Seals: Picture this: a wax seal that transitions from deep ocean blue to the golden hues of a setting sun, or from the vibrant red of a coral reef to the serene teal of the deep sea. With the 3D Relief Conch Star Wax Seal Stamp, crafting gradient color wax seals is a breeze. Start with one color and gradually blend it into another color of wax, like a watercolor masterpiece.
- Embellishing Ornaments: Take your seals to the next level by adding enchanting embellishments. Small pearls, like the treasures of a sunken pirate chest, can be affixed to your seals, providing a tactile and visual delight. Shimmering powders, reminiscent of sun-dappled waves, can be gently sprinkled over the wax before it cools, creating a sparkling effect that catches the light like the ocean's surface.
- Multiple-Layer Wax Seals: As you explore the potential of the 3D Relief Conch Star Wax Seal Stamp, you'll discover the wonder of multiple-layer wax seals. Imagine one layer with the 3D Conch Star itself, and another layer featuring a border of seashells. Perhaps the top layer is translucent like the surface of the sea, revealing a glimpse of the layers beneath. These seals tell a story, each layer adding depth and intrigue.
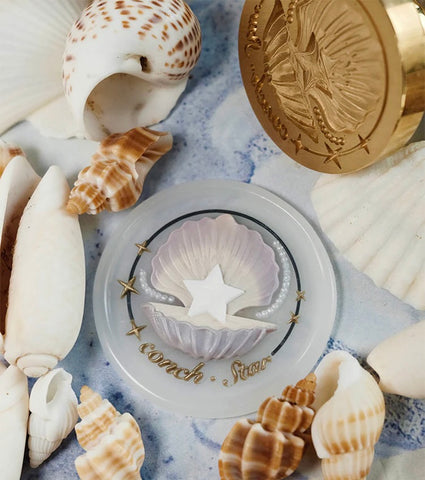
Creating a Holographic Double-Layer Wax Seal
Among all these creative methods, we'd like to introduce you to one that stands out as truly mesmerizing – the holographic double-layer 3D conch wax seal. It's a technique that combines artistry and craftsmanship, creating a wax seal that shimmers and gleams with the play of light.
Creating a holographic double-layer wax seal is a multi-faceted process, a true detailed labor. It involves selecting the right materials, choosing the ideal tools, precise cutting, and meticulous sticking. Let's dive into the process step by step now. Here are the tools and step-by-step instructions for creating double-layer holographic conch wax seals:
Materials and Tools You'll Need:
- 3D Conch Star Wax Seal Stamp
- Melting Equipment
- Holographic Paper
- Wax in transparent, light pink, light yellow, blue, or your preferred colors
- A pair of scissors
Steps:
Step 1: Melt transparent wax and create a pre-made holographic conch wax seal
Begin by melting transparent wax using your chosen melting equipment. Once it's in a liquid state, carefully drop small amounts of the transparent wax onto the holographic paper. The holographic paper will add a shimmering effect to your conch seal.
Step 2: Press the wax with the 3D relief conch star wax seal stamp
While the transparent wax is still soft and malleable, press the 3D Conch Star Wax Seal Stamp into the wax to create a base layer. The stamp should leave a detailed impression of the conch while allowing the holographic paper to show through. This will make the conch design itself appear holographic.
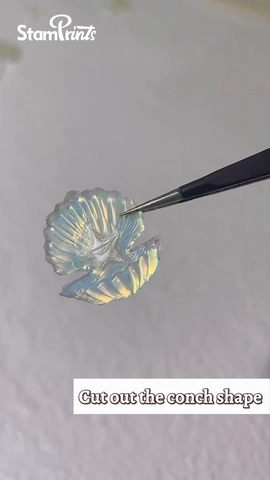
Step 3: Cut out the pre-made holographic conch
Use a pair of scissors to carefully cut out the conch shape from the holographic paper. This will result in a pre-made holographic conch wax seal that you will use as the first layer of your double-layer seal.
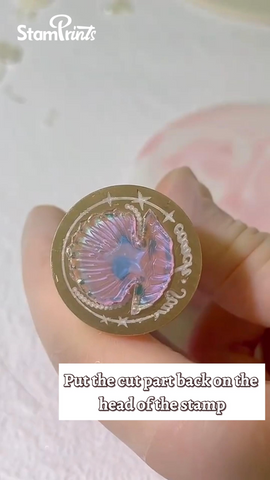
Step 4: Place the pre-made holographic conch back on the stamp head
Carefully position the pre-made holographic conch wax seal back onto the stamp head of the 3D Conch Star Wax Seal Stamp. This will be the central design element of your wax seal.
Step 5: Melt the background wax color
Melt the wax in your chosen background color (e.g., pink or any other color you desire for the background of the conch). Ensure it's fully melted and ready for use.
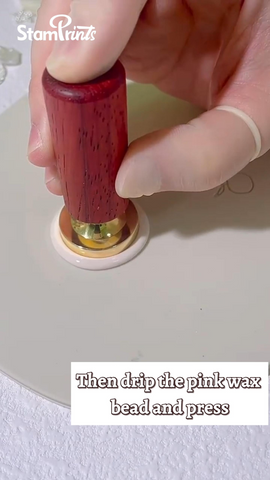
Step 6: Press the pink wax onto a silicone mat
Create a pool of the background color wax by gently dripping it onto a silicone mat. This will provide a surface for you to press the wax seal stamp.
Step 7: Press the wax seal stamp
Take the 3D Conch Star Wax Seal Stamp with the pre-made holographic conch attached to it and press it into the pool of pink wax on the silicone mat. The pink wax will create a background that frames the holographic conch.
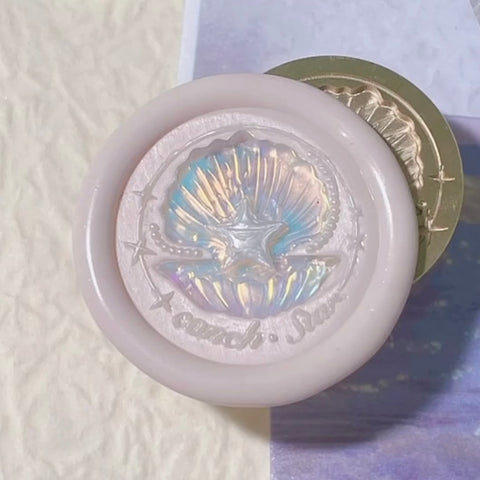
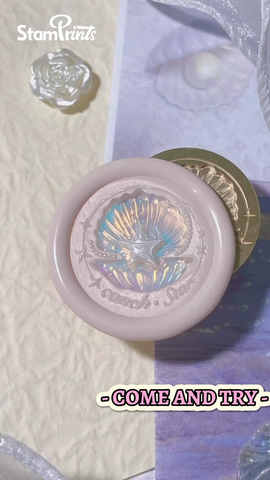
Step 8: Complete your double-layer holographic conch wax seal
Gently lift the stamp to reveal your double-layer holographic conch wax seal. The holographic conch, attached as the first layer, appears three-dimensional and captivating against the background wax color. You've successfully created a beautiful, unique wax seal that's perfect for adding a touch of enchantment to letters, invitations, and more.
Step 9: Explore variations
Don't hesitate to explore different colors and combinations to create a variety of 3D wax seals. Experimenting with colors will allow you to craft unique, eye-catching designs that captivate and impress.
With these steps, you've mastered the art of crafting double-layer holographic conch wax seals using the 3D Conch Star Wax Seal Stamp. Each seal you create is a stunning piece of art, ready to adorn your correspondence and creative projects.
Now, the adventure begins. Dive into the enchanting world of wax sealing with our 3D Relief Conch Star Wax Seal Stamp and let your imagination set sail. Your letters and creative projects are about to take on a whole new dimension, where artistry meets craftsmanship, and the results are simply mesmerizing. More tutorial videos can be found below! Enjoy your wax sealing journey, and may each seal be a testament to your boundless creativity. Happy crafting!