


맞춤 황동 브랜딩 아이언: 음식, 나무 및 가죽용 가열 스탬프
맞춤 황동 브랜딩 아이언: 음식, 나무 및 가죽용 가열 스탬프
SKU:P6949-00010
엠보서를 선택할 때 패턴 디자인, 다이 소재 또는 정밀도에 집중할 수 있지만, 방향을 간과하지 마세요. 엠보서 방향은 매우 중요하며, 다양한 유형이 여러 상황에 적합합니다.
이 가이드는 엠보서 방향을 심층적으로 탐구하여 올바른 엠보서를 선택하고 효과적으로 사용할 수 있도록 도와드립니다.
엠보서 방향이란 무엇인가요?
엠보서 방향은 엠보싱 중 페이지에서 패턴의 방향, 즉 패턴이 표현되는 방식을 나타냅니다. 간단히 말해, 방향은 엠보싱된 패턴이 어느 방향에서 페이지에 들어가고 어떤 각도로 표시되는지를 결정합니다.
엠보서의 방향은 일반적으로 상, 하, 좌, 우의 네 가지 유형으로 나뉩니다.

엠보서는 왜 방향을 고려해야 하나요?
엠보서의 깊이 한계
더 깊은 엠보싱이 필요하다면 데스크탑 엠보서를 고려해 보세요.

사용 시나리오에 대한 적응성
기계적 설계 한계 외에도, 방향의 선택은 실제 사용 시나리오에 의해서도 영향을 받습니다. 다양한 용지(예: 문서, 편지, 카드 등)는 각각 적합한 방향이 다릅니다.
예를 들어, 상장은 종종 가로 방향으로 배치되며, 엠보싱된 배지나 장식은 텍스트의 방향과 일치해야 하므로 하단 방향이 선호되는 경우가 많습니다.
나에게 맞는 올바른 엠보서 방향 선택하기
엠보서 방향은 사용 시나리오와 디자인 의도에 따라 달라집니다.
예를 들어, 증명서, 봉투, 문서는 일반적으로 하단 방향을 사용하며, 패턴이 문구류의 하단에 엠보싱되는 경우가 많습니다. 책, 계약서, 브로슈어는 우측 방향이 적합하며, 레터헤드와 명함은 상단 방향이 가장 적합합니다. 한편, 예술적인 카드는 엠보싱 범위가 유효 영역을 커버할 수 있도록 측면 방향이 유리할 수 있습니다.
아래는 엠보서 방향의 일반적인 선택 사항입니다:
| 사용 시나리오 | 엠보서 방향 |
|---|---|
| 증명서, 티켓, 문서 | 하단 방향 |
| 책, 패키지, 공식 용도 | 우측 방향 |
| 레터헤드, 명함 | 상단 방향 |
방향 선택에 여전히 어려움을 겪고 계신가요? Stamprints에 필요한 사항을 자유롭게 알려주시면 함께 해결해 드리겠습니다!
제품 세부 정보
제품 세부 정보
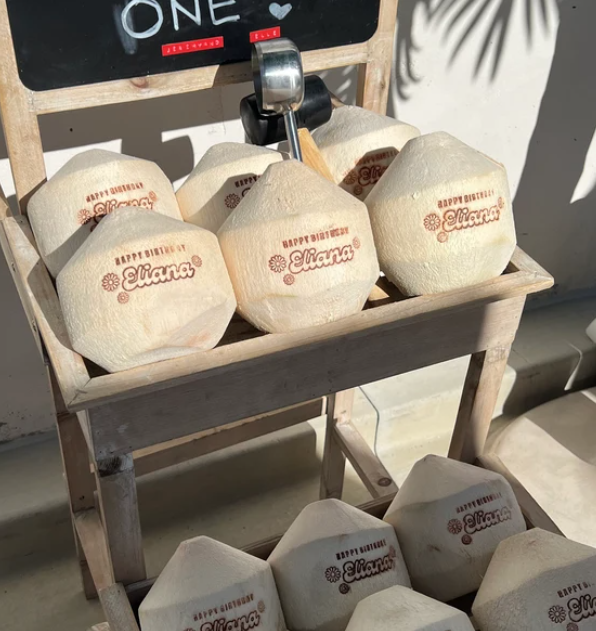
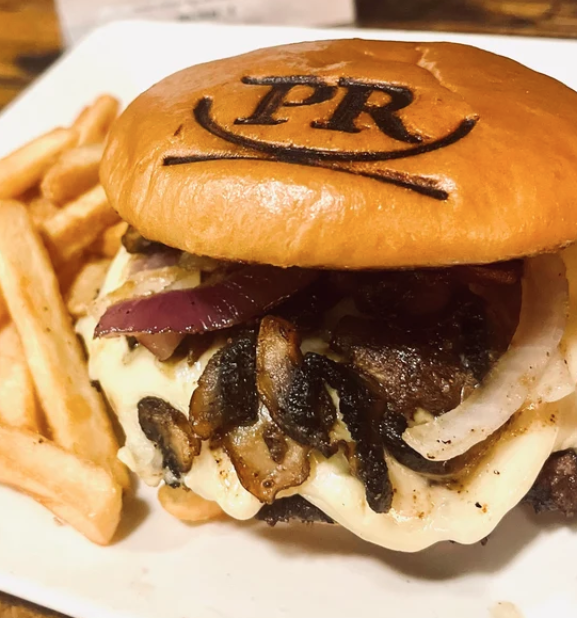
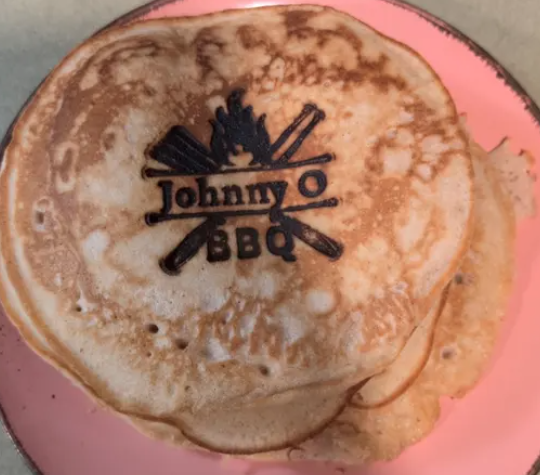
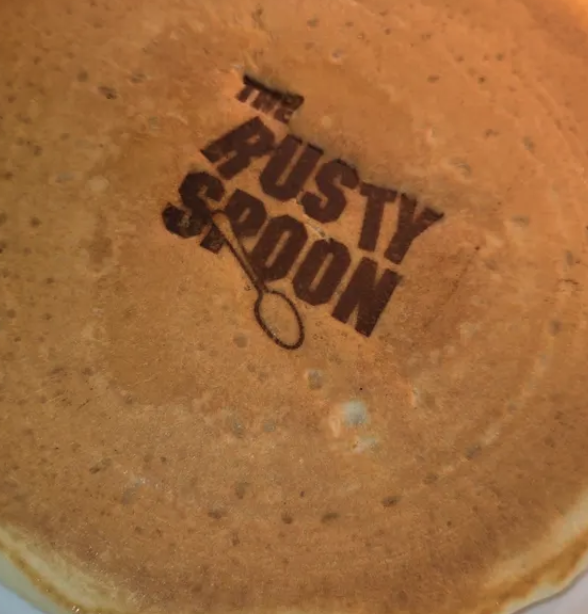
자신만의 로고, 아트워크, 이니셜 또는 디자인으로 제작된 맞춤 황동 브랜딩 아이언으로 식품, 나무, 가죽 및 기타 적합한 표면에 선명하고 인식 가능한 브랜드 인상을 남기세요.
각 황동 헤드는 3mm 깊이로 정밀 CNC 조각되며, 아트워크에 맞게 윤곽 절단됩니다. 특별히 두꺼운 10mm 황동 플레이트는 열을 효율적으로 저장하여 여러 번 사용해도 선명하고 반복 가능한 인상을 만들어냅니다.
장인 빵, 버거 번, 케이크, 수제 목공예품 또는 가죽 제품에 브랜딩하든, 귀하의 로고는 포장재가 아닌 완성된 제품의 일부가 됩니다.
◎ 조각 깊이: 3mm 딥컷 CNC 조각
◎ 황동 헤드 두께: 10mm
◎ 형태: 맞춤 윤곽 절단
◎ 사용 가능한 크기: 30 / 40 / 50 / 60 / 70mm (맞춤 제작 가능)
●식품 안전 인증: 무연 황동과 스테인리스 스틸 봉으로 제작되어 적절히 사용하고 세척할 경우 빵, 번, 버거, 패스트리 등의 식품 브랜딩 용도에 적합합니다.
●고화질 마킹: 우수한 3mm 깊이로 CNC 조각되어 부풀어 오르는 반죽이나 결이 있는 크러스트에서도 돋보이는 날카롭고 선명한 인쇄를 만들어냅니다.
●인체공학적 제어: 내열성 경목 핸들을 갖추고 있습니다. 버거를 뒤집을 때는 곡선형 넥을, 케이크에 정밀한 압력을 가할 때는 직선형 넥을 선택하세요.
●우수한 열 보유력: 특별히 두꺼운 10mm 황동 헤드는 일반 스탬프보다 더 오래 열을 유지하여 대량 생산 시 일관되고 빠른 브랜딩이 가능합니다.
처리 및 배송
처리 및 배송
친절한 반품 정책
친절한 반품 정책
이 제품 공유하기
마음에 들지 않으시면 바로잡아 드리겠습니다
저희는 만드는 모든 제품에 자부심을 가지고 있습니다. 어떤 문제든, 언제든지—저희는 고객님의 완전한 만족을 위해 최선을 다하겠습니다.
소재 및 제작
당신의 시그니처 베이크에 어울리는 프로페셔널한 터치

무연 솔리드 황동

정밀 조각
특징
모든 인상에서 타의 추종을 불허하는 품질을 경험하세요.

토스트

케이크

나무
베이킹 스탬프 빠른 가이드

화염 가열 베이킹 스탬프 가이드
① 가열: 황동 헤드를 중간 가스 불꽃 위에 60–90초 동안 유지하세요. 과열을 피하세요.
② 테스트: 사용 전에 빵 조각에 스탬프를 찍어 온도를 확인하세요.
③ 스탬프: 구운 표면에 1–2초 동안 수직으로 눌렀다가 수직으로 들어 올리세요.
④ 제공: 스탬프가 찍힌 빵을 바로 제공할 수 있습니다.
팁:
3–5번 스탬프를 찍을 때마다 약 10초 동안 재가열하세요.
스탬프 디자인이 클수록 더 긴 가열 시간이 필요할 수 있습니다.

전기 베이킹 스탬프 가이드
① 설치: 플러그를 꽂기 전에 황동 스탬프 헤드를 단단히 부착하세요.
② 온도 설정: 재료에 따라 온도를 조절하세요.
③ 예열: 사용 전 스탬프를 3~5분 동안 예열하세요.
④ 스탬프: 수직으로 눌러 1~2초 유지한 후 수직으로 들어 올리세요.
팁: 먼저 스크랩 조각에 테스트하고 필요에 따라 온도를 조절하세요.
온도 가이드
가죽: 250–535°F (120–280°C)
호일 스탬핑: 265–285°F (130–140°C)
플라스틱 및 합성 소재: 355–570°F (180–300°C)
목재 제품: 570–660°F (300–350°C)
빵 및 케이크: 660°F (350°C)
코코넛 및 대나무: 660–715°F (350–380°C)
팁: 낮은 온도에서 시작하여 필요에 따라 조절하세요.