Embossing is an old craft that creates delicate patterns on paper. The embosser brings this tradition into everyday life, with designs improved to fit today’s needs. It lets anyone easily add a raised effect to things like documents, business cards, or envelopes.
How did this craft evolve into a creative must-have, and how does it bring unique charm to our projects? In this article, we’ll dive into the world of embossing, covering the basics and handy tips to get you started.
What Is an Embosser? Meet Your New Creative Sidekick
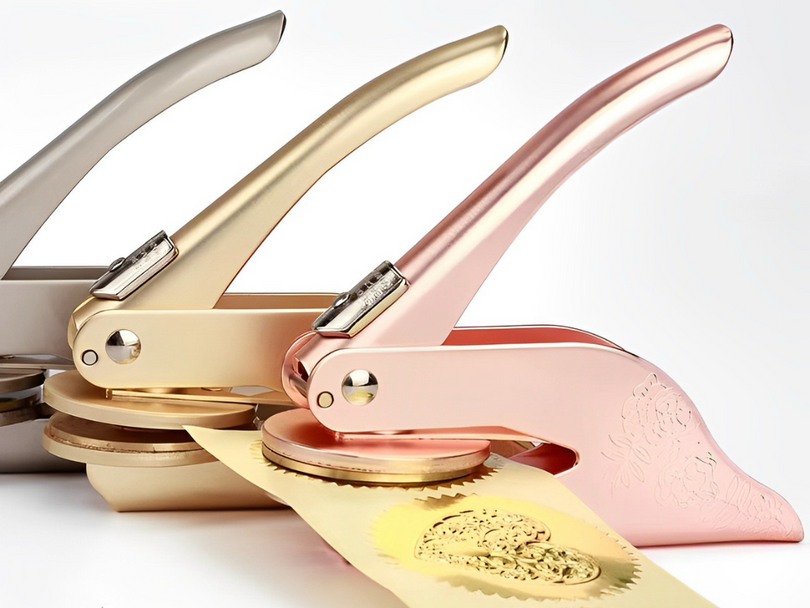
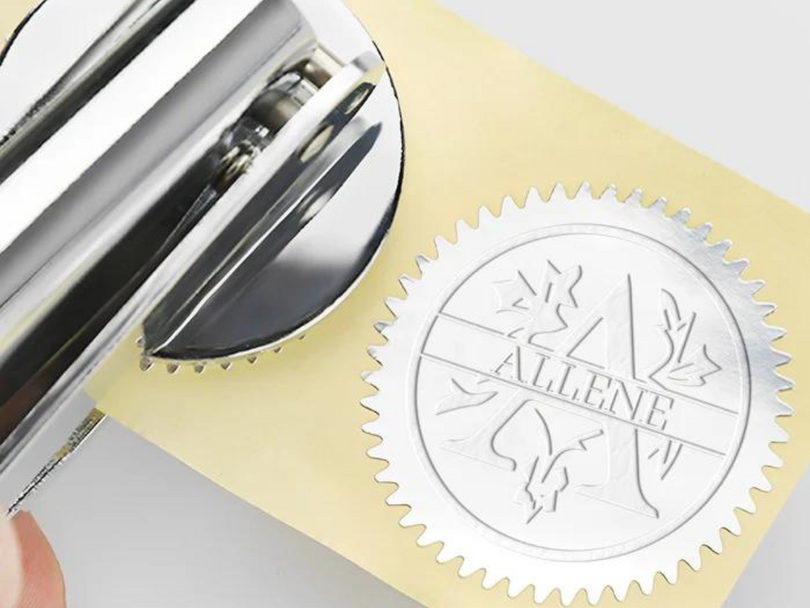
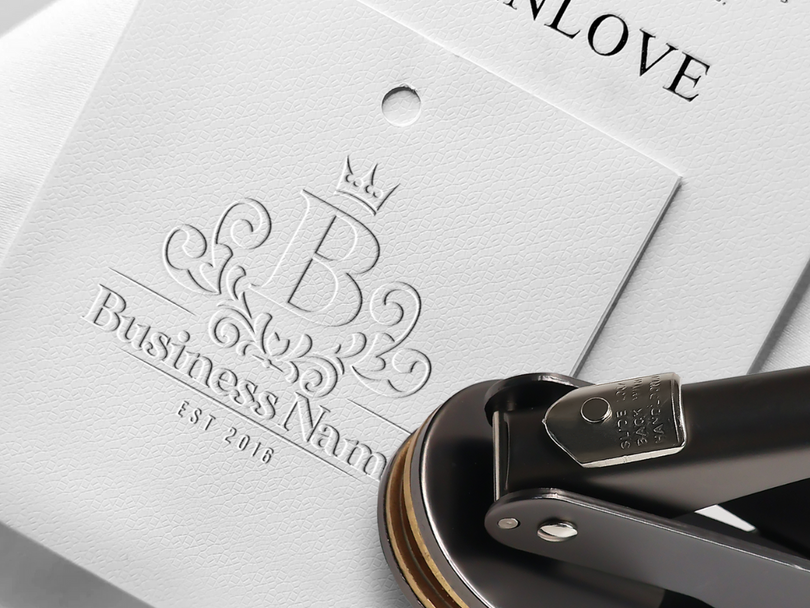
An embosser is a tool that uses pressure to create raised, textured patterns on paper. Unlike a printer that’s limited to flat designs, an embosser gives you a 3D effect you can actually feel. It doesn’t rely on ink or color—just a simple press reshapes the paper into a clean, sophisticated relief.


A Quick History of Embossing: From Ancient Craft to Modern Must-Have
Fast forward to today: thanks to advancements in materials and manufacturing, embossers have shrunk down and gone mainstream, landing in the hands of everyday creators like you.

How an Embosser Works: The Secret Behind Paper’s 3D Magic
The concept is simple: place paper between two molds, apply pressure, and voilà—the paper’s fibers shift into a lasting, raised design. Once that shape sets, it’s there to stay, even after the pressure’s gone.

Types of Embossers: Find Your Perfect Match
By Purpose
-
Document Embossers: Ideal for pro-level certificates
These are built for official stuff like diplomas or business letters, pressing logos or seals with precision and durability.

-
Business Embossers: Level up your commercial projects
Designed for creative gigs like business cards or invitations, these often come with swappable molds for max flexibility.

-
Personal Embossers: Your DIY go-to for letters and bookmarks
Small and user-friendly, perfect for personal notes, envelopes, or little gifts.

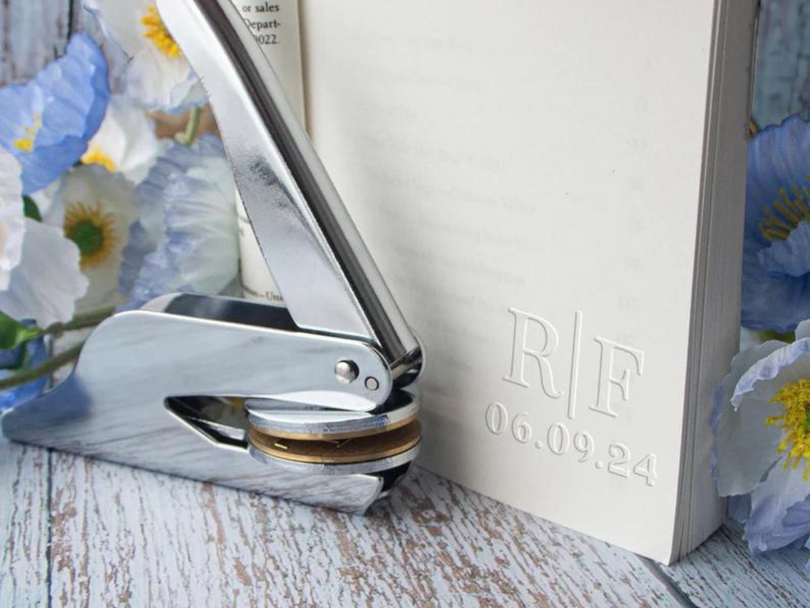
Portable vs. Desktop: Which Style Suits You?
|
Type |
Features |
Best For |
|---|---|---|
| Handheld | Compact, lightweight, portable | Casual users, small projects |
| Desktop | Sturdy, smooth operation | Frequent crafters, thicker paper |

Short-Reach vs. Long-Reach: Where Do You Want Your Design?
-
Short-Reach Embossers: Great for small paper or edge details
Compact and nimble, these shine on envelopes, tags, or business cards. -
Long-Reach Embossers: Built for big sheets or deep designs
Stable and strong, they’re your pick for book covers, certificates, or wrapping paper.

Pros and Cons of Embossers
The unique strengths of an embosser make it a favorite in both creative and professional circles. It delivers a tactile, three-dimensional texture that flat printing can’t match, enhancing your work with a refined, sophisticated feel. Specific embossed patterns are tough to duplicate, offering a built-in anti-counterfeiting perk. Plus, with no need for ink or refills, it’s a one-time investment for long-term use.
That said, embossers have their limits. Their technical nature means they’re not ideal for overly intricate designs—simple patterns shine brightest. Also, paper choice matters; not every type works well, so you’ll need to pick carefully based on material and thickness.
How to Use an Embosser: Zero-to-Hero in Minutes
- Unbox It: Check that everything’s intact and accounted for.
- Set It Up: Slide the die into place—match it to the machine’s slots.
- Pick Your Paper: Go for something embossing-friendly.
- Place It: Lay the paper flat on the base.
- Line It Up: Mark your spot lightly with a pencil if needed.
- Press Down: Adjust pressure for the paper’s thickness, then squeeze the handle or crank it.
- Check It Out: Pull the paper free and admire your work!

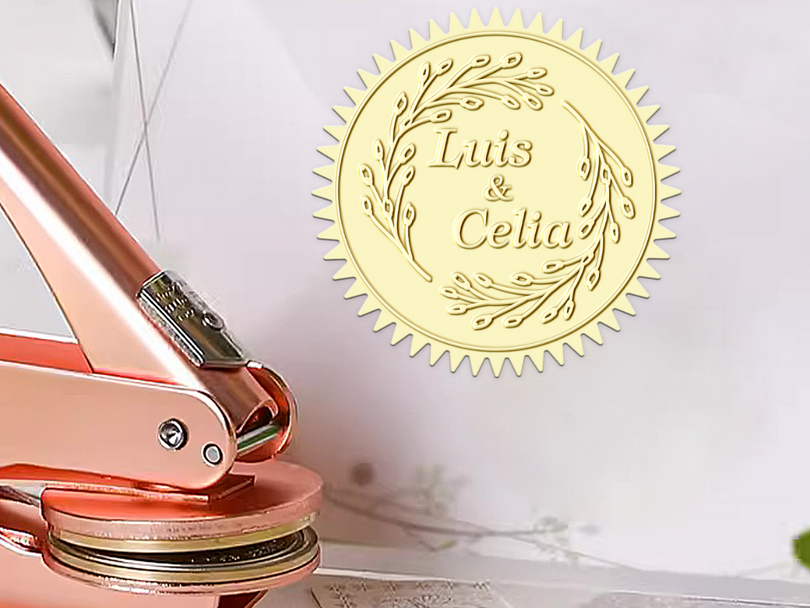
Embossing Direction Tips: How to Choose the Best Orientation
The direction you choose for your embosser is key, as it determines how the embossed pattern appears on the page. Typically, you’ve got four options: top, bottom, left, and right.
Top Orientation
- Advantage: Top embossing makes the design stand out, perfect for formal settings.
- Best For: Top decorations on envelopes, certificates, and similar items. For example, with certificates, aligning at the top is easier and keeps the embossed effect consistent.
Bottom Orientation
- Advantage: Subtle and elegant, adding a layered feel to your design.
- Best For: The bottom of stationery, business cards, wrapping paper, and more.
Left Orientation
- Advantage: Great for vertical patterns, balancing the page layout and making it eye-catching when viewed from the side.
- Best For: Greeting cards, documents, and similar projects.
Right Orientation
- Advantage: The right side often has empty space, so this orientation adds detail, showing thoughtfulness and care.
- Best For: Inner pages of books, sides of packaging boxes, and more. For instance, embossing book pages from the right makes the process smoother.

Maintaining Your Embosser: How to Make It Last
Keeping your embosser in top shape is a breeze:
- Wipe it down with a soft cloth after use to clear away paper scraps.
- Store it in a dry spot to prevent moisture from rusting metal parts.
- Check the screws regularly to make sure nothing’s loose.
- Don’t push it too hard or try embossing super thick materials.
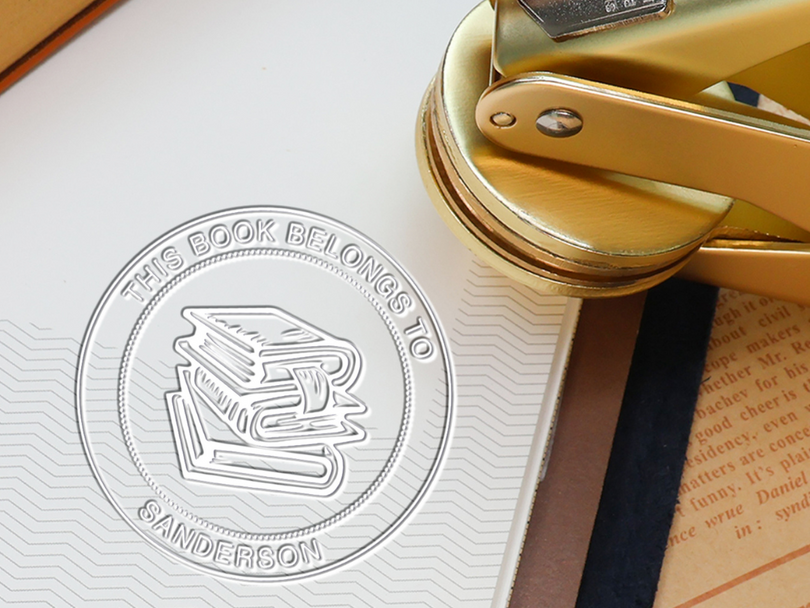
Where Embossers Shine
Personal Projects
- Greeting Cards: Holiday, birthday, or thank-you cards with pro-level flair
- Stationery: Initials or tiny designs on letters and envelopes
- Bookmarks: Cute, custom gifts that double as keepsakes


Special Moments
- Weddings: Monograms on invites, place cards, or thank-yous
- Holidays: Memorable touches for festive keepsakes

Business & Official Use
- Branding: Logos on cards or letterhead
- Certificates: Official vibes with built-in security
- Packaging: High-end polish for premium products

How to Pick the Right Embosser
Match It to Your Needs
|
Need |
Frequency | Project Size | Portability | Budget | Paper Type | Best Pick |
|---|---|---|---|---|---|---|
| Bookmarks | Low | Small | Yes | Low | Thin cardstock | Handheld |
| Wedding Invites | Medium | Medium | Yes | Medium | Colored paper | Handheld |
| Contracts | High | Large | No | High | Thick cardstock | Desktop |
| Branding | Very High | Large | No | High | Kraft/Sulphite | Desktop |
Choosing a Seller
Choosing the right seller ensures you get a durable embosser and enjoy excellent service, which is crucial for your creative experience and the quality of your work. A good seller not only provides an embosser that meets your needs but also offers reliable support, preventing the frustration of a complicated shopping process from dampening your creative enthusiasm.
| Seller | Customization Service | Engraving Precision | Material | After-Sales Service | Price |
|---|---|---|---|---|---|
| Amazon | Semi-Custom | ★ | Plastic + Alloy | ❌ | Medium |
| Local Shops | Full Custom | ★★★ | Alloy | Varies by Store | High |
| Stamprints | Full Custom | ★★★ | Brass + Stainless Steel | ✅ | Medium |
If you want your embossing projects to stand out, consider choosing Stamprints—our exceptional craftsmanship and thoughtful service perfectly meet your needs, making every creation full of surprises and peace of mind!
Get Started with Embossing Today!
An embosser is a fun, easy way to bring real texture into our screen-heavy world. One press, and plain paper turns into something special.
Ready to give it a shot? Click to learn more and add a little magic to your next project!

FAQ
Q: How Does an Embosser Work?
Q:What Are the Different Types of Embossers?
A:There are several different types of embossers available, each designed for specific purposes. The most common types include seal embossers, which are often used for official documents, and custom embossers, which allow for personalized designs. Understanding these different types of embossing can help you choose the right one for your needs.
Q: How can embossers be used in different projects?
A: Embossers can be used for a wide range of projects! They’re great for adding a logo or message to business cards, creating an impression on paper for certificates, or even personalizing mail like envelopes and letters.
Q: Can I personalize a notary seal embosser?
A: Notary embossers can often be customized with your name or commission details, but they need to meet legal standards. You can use a customized embosser as a valuable tool to imprint your information onto the paper of official documents and applications, creating an elegant look.
Q: Do I need to replace parts on my customize embosser often?
A: Nope! With proper care—like wiping it down and storing it dry—your embosser (seal embosser or otherwise) can last for years without needing anything new. Just don’t force it on super thick materials, and you’re golden.Just don’t force it on super thick materials, and you’re golden.